Hi everyone!
Happy November and the start to the holiday season :) lol.
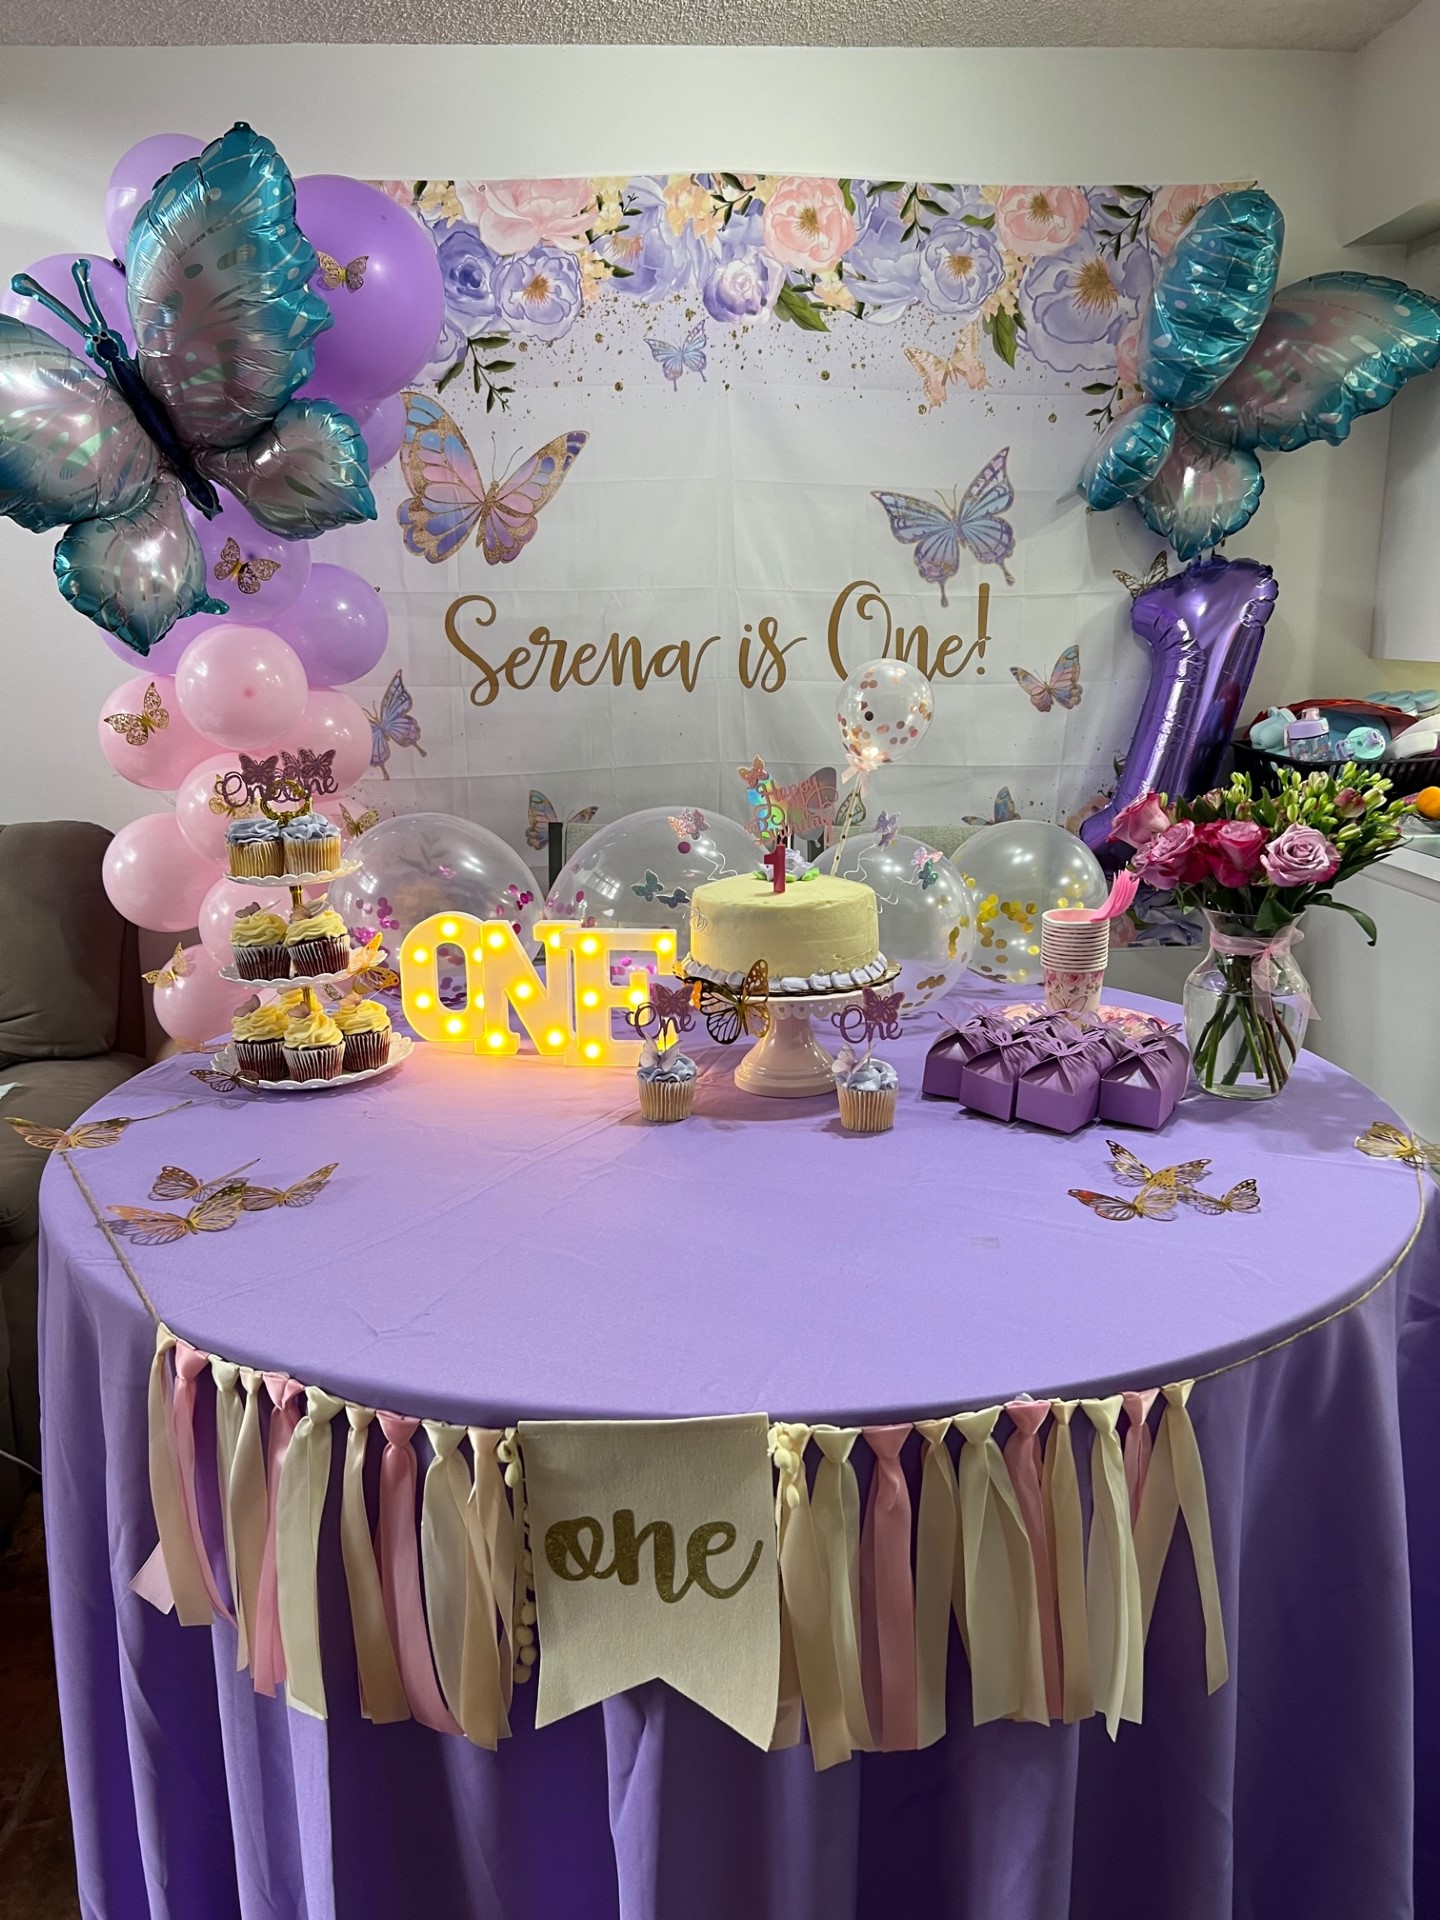
A few days ago we celebrated my daughter's 1st birthday!!! I cannot believe I am going to have a one year old, like what?! It feels like she was born yesterday! With that being said I wanted to share how I decorated for her small party at home and how it can be achieved without breaking the bank! Since her 1st birthday was mostly adults and I was not concentrating on having child activations since she can't even walk yet lol. I still wanted to make it special and memorable for her, via photos at least ;)
So what I did was make a main table (which is our dining table) the center piece of the gathering. In other words, where the cake and treats would be. With this in mind I also wanted some sort of signage and balloon garland design, and I was able to do both on my own! I will be listing and breaking down everything I used below. !
WHAT I DID!
The first thing I did was start to put the table together, meaning putting the table cloth, cake stand, cupcake stand, party favors, flowers, etc. I also hung the main banner that went behind the table!
After this, I separated the balloons by sizes. Now to be honest, I was not sure how many balloons I was going to be using, so I basically blew up all of them and then I would figure it out lol. I mainly used 18", 10" and some 5" balloons for added details. All of the balloons came in a kit together with absolutely everything you need to make a garland.
I started with the biggest sizes first (18" and 10") . I would blow up two of them and tie them together and move on. I did this with all of the balloons. I tied them all into a duo. That way it would be easier to handle then just one by one.
Almost done here
This is the air balloon machine I used. It is small but powerful. It is so helpful having one because no one has time to blow these balloons manually lol.
Here is where I started putting them on the "balloon tape". This tape is basically a clear long strap with holes that you can hang the balloons from! This tape came with the balloon kit. It also came with glue/tape dots! What I did was I basically put in one of the ends of each duo (2 balloons) in each hole. I would leave one empty in between so I wouldn't run the risk of them slipping off. I also tried to keep them together and full as much as possible. I believe this is the most important part because if they are too far apart, it will not look like a garland lol.
I used three colors from the kit: lavender, pink, and orange. I tried my best to match the colors of the banner lol. Now after the garland was assembled, I used a push pin to mount it on the wall. I made sure to leave a good amount of the "balloon tape" at the top to be able to mount it on the wall. I used a push pin and inserted it in one of the balloon tape holes!
The rest was pretty simple to do. The butterflies and the number 1 balloon are all stuck with the glue dots or regular tape! After a while it would fall off, but I just kept adjusting it and it was fine.
Cake/cupcakes from Publix!
Gold butterflies came with the balloon kit, as well as the butterfly balloons. This kit in specific is for a butterfly theme lol.
Things I used:
xo
Estephanie
loading..


No comments